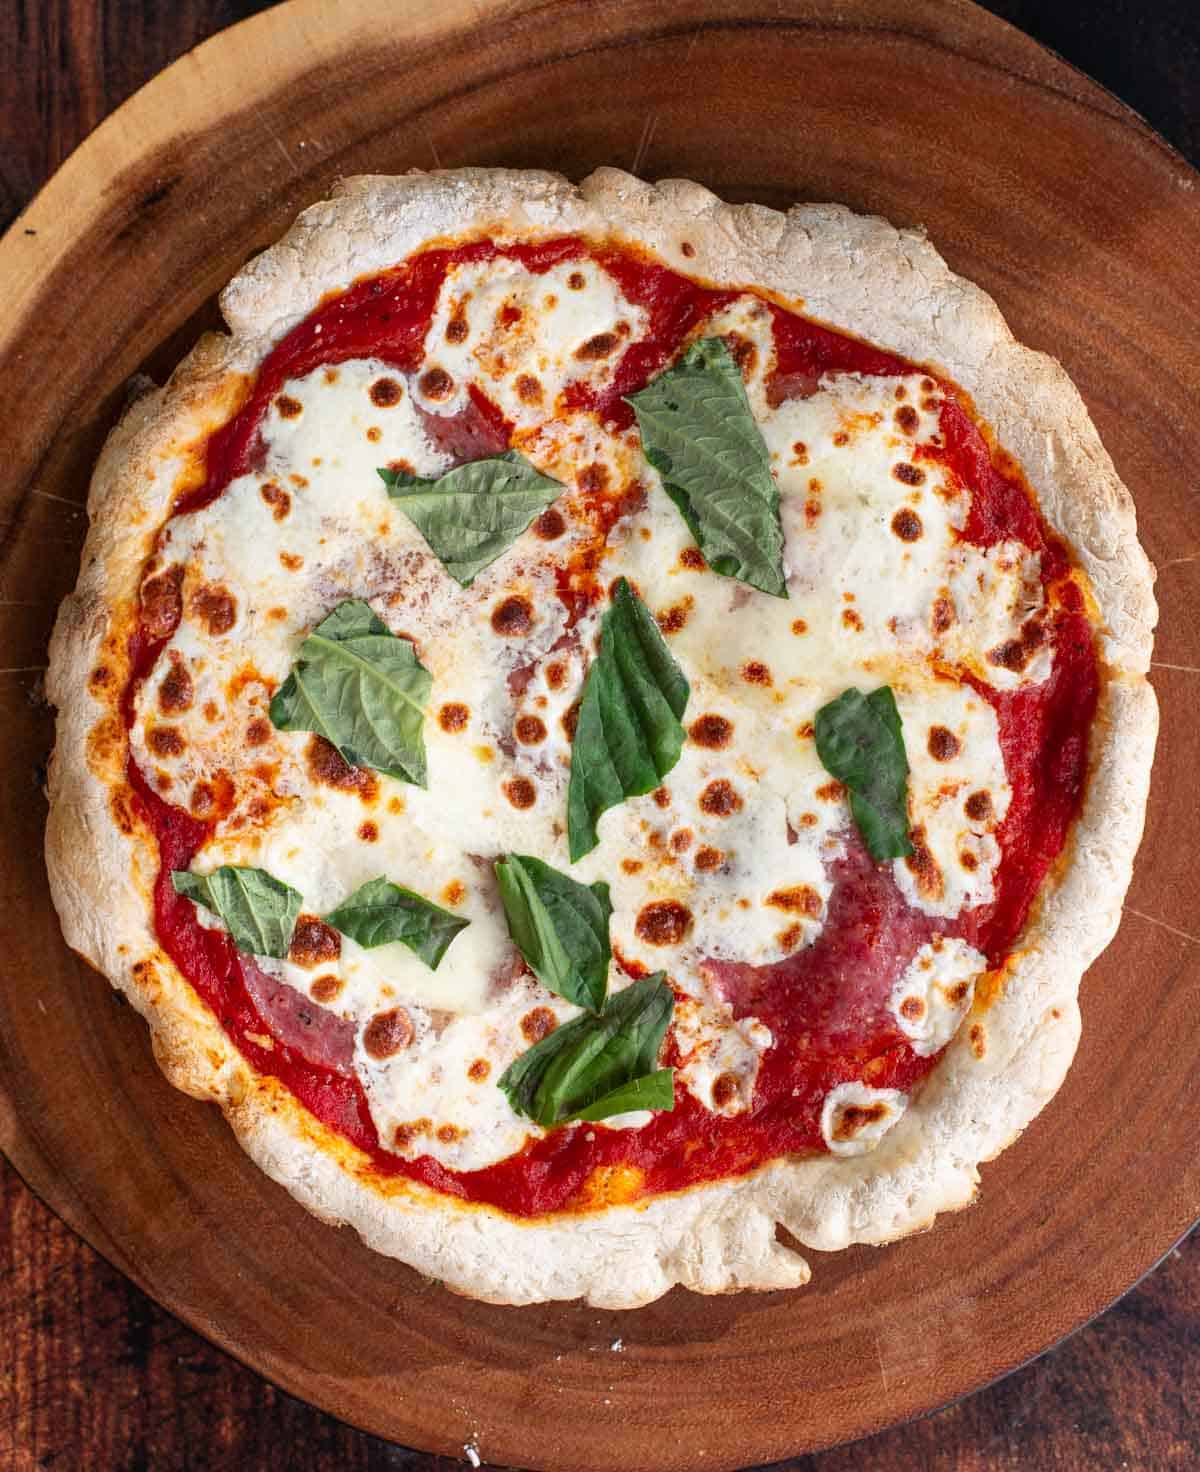
This incredible Gluten Free Pizza Dough is as close to the real thing as we’ve ever tasted! The most important ingredient is the right crust (aka the right flour mix). Using some basic techniques and some time this recipe will help you achieve a soft crust that is chewy and still gets that nice crunchy crust without sacrificing flavor.
Recipe Highlights
- There is no need to par-bake your pizza using this dough.
- The dough can be frozen for a make ahead pizza dough.
- You can make this with one flour versus mixing your own from scratch.
- Works great for Neapolitan or NY Style Pizzas.
My kids have been gluten free for several years now. And when we go out to restaurants we eat the same thing as them. Pizza has become a sad experience. And I never thought we could ever experience the delicious and chewy crust that comes from a classic Neapolitan style pizza dough using gluten free alternatives. But there are two restaurants (one in Oregon and one in Utah) that changed all that. How did they achieve such incredible gluten free crust? One that had me question whether they actually sent us the gluten free pizza or made a mistake. After a few phone calls and asking (ok begging) specific questions, they told us their secret. The thing both restaurants had in common was they both used the same imported gluten free Italian flour.
[feast_advanced_jump_to]Ingredients
While the recipe list is small each plays an important role in the ease of making the pizza and the texture when it’s cooking.
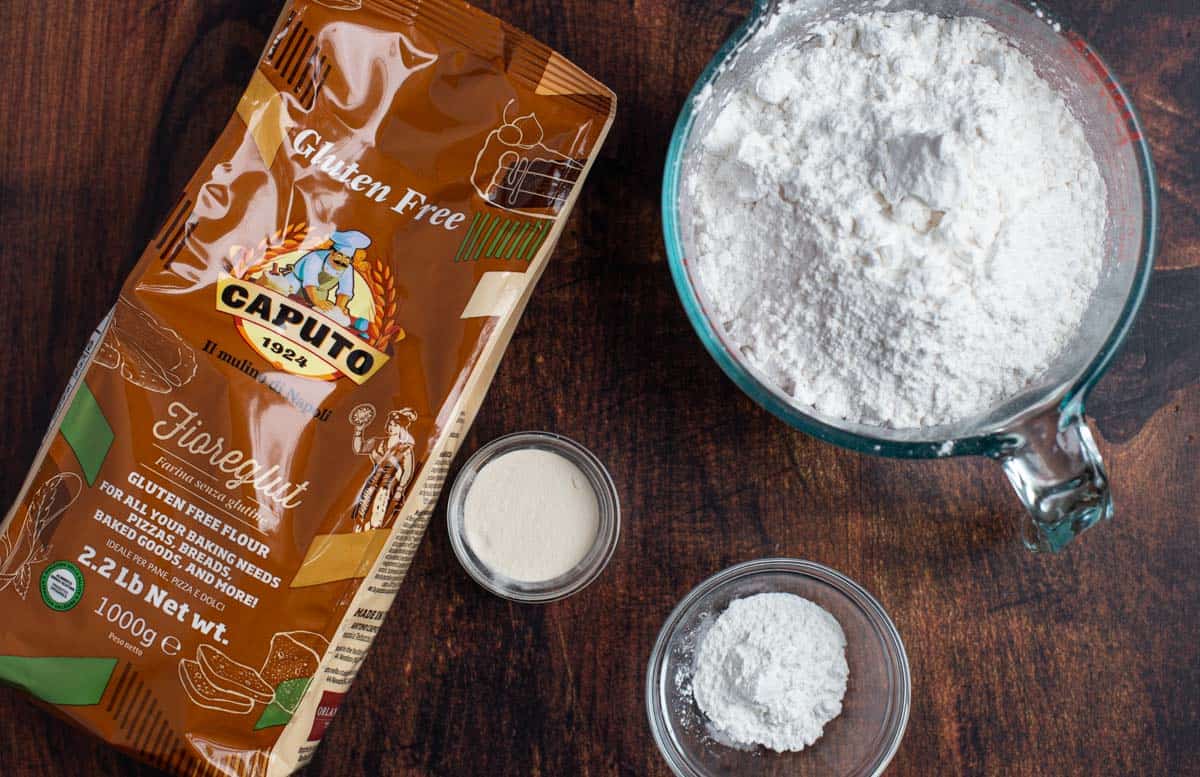
- Gluten Free Flour – We use Caputo Fioregento, and strongly recommend it for this dough. You can find it online or in your better grocery stores (call ahead to confirm). This flour is the key to gluten free pizza success!
- Water – Warm water is important to create heat and activate the yeast. Ideally between 90 and 100 degrees Fahrenheit.
- Fresh Active Yeast – We don’t like the instant as it creates too much rise. (also, yeast is gluten free) If all you have is fast acting or instant – use half the amount.
- Kosher Salt – Don’t use table salt as it’s too salty.
- Baking Powder – Helps with the rise while the pizza is cooking and supplements the yeast.
- Xanthan Gum – This is important for this specific flour to help with the stretch. If you use a different flour then check and see if there is already xanthan gum in it.
A note on yeast – One of the biggest reasons people don’t see a rise is using yeast that is expired (or dead). Be sure you use fresh active yeast.
The Best Gluten Free Flour for Making Pizza
When making gluten free pizza it’s important to use a gluten free flour that has the right protein count. Not all flours have that, which is why we do NOT recommend mixing your own flours when there are some out there already made for this.
The protein in the flour is what helps it stick together and not get crumbly. So when making this pizza dough recipe be sure you use a flour that has a good protein level.
- The number one flour we recommend for gluten free pizza dough is Caputo Fioregento ($18 for 2 kilograms of flour). We have served this to so many people and when tested it is by far the superior dough to replicate the classic flavor and texture. This flour does not contain Xanthan gum (which is why we add it to our mix).
- If you can’t find or don’t want to spend the money on the Caputo then Bob’s Red Mill Baking Flour is the second we’d recommend. The finer grind on this is great for pizza. But seriously, go with the Caputo and taste for yourself the difference.
- Avoid flours that are heavy in almond flour as they tend to just crumble.
Hydration
Hydration is the ratio of water to flour. The reason this is important is to make sure your dough is not too dry or too wet for the type of pizza you want. We go into more detail on hydration in our pizza dough article. But the same applies to gluten free pizza dough.
We find a 70% hydration level is perfect for gluten free flour to keep the dough wet but not too sticky you can’t work with it. The warm water also helps to get the yeast activated to add those precious air bubbles into your dough through the fermentation process.
Fermentation
Not all gluten free recipes have a fermentation process. This one does.
The fermentation or rise process is very important and happens in two stages. The first is to let the entire dough ball rise to get those important air pockets.
The second is to divide the dough into three dough balls and let that occur a second time over a few hours. For a full run down you can see our Neapolitan Pizza Dough recipe. The process is similar, and we’ve discovered necessary for the truly soft dough experience.
That fermentation helps to give the dough it’s bouncy feel and, when cooked, the right texture when eating.
Kneading: Technically there is no gluten being converted so kneading isn’t as important as it would be with traditional flour. The goal is to simply form the dough into uniform balls for the first and second fermentation.
Instructions
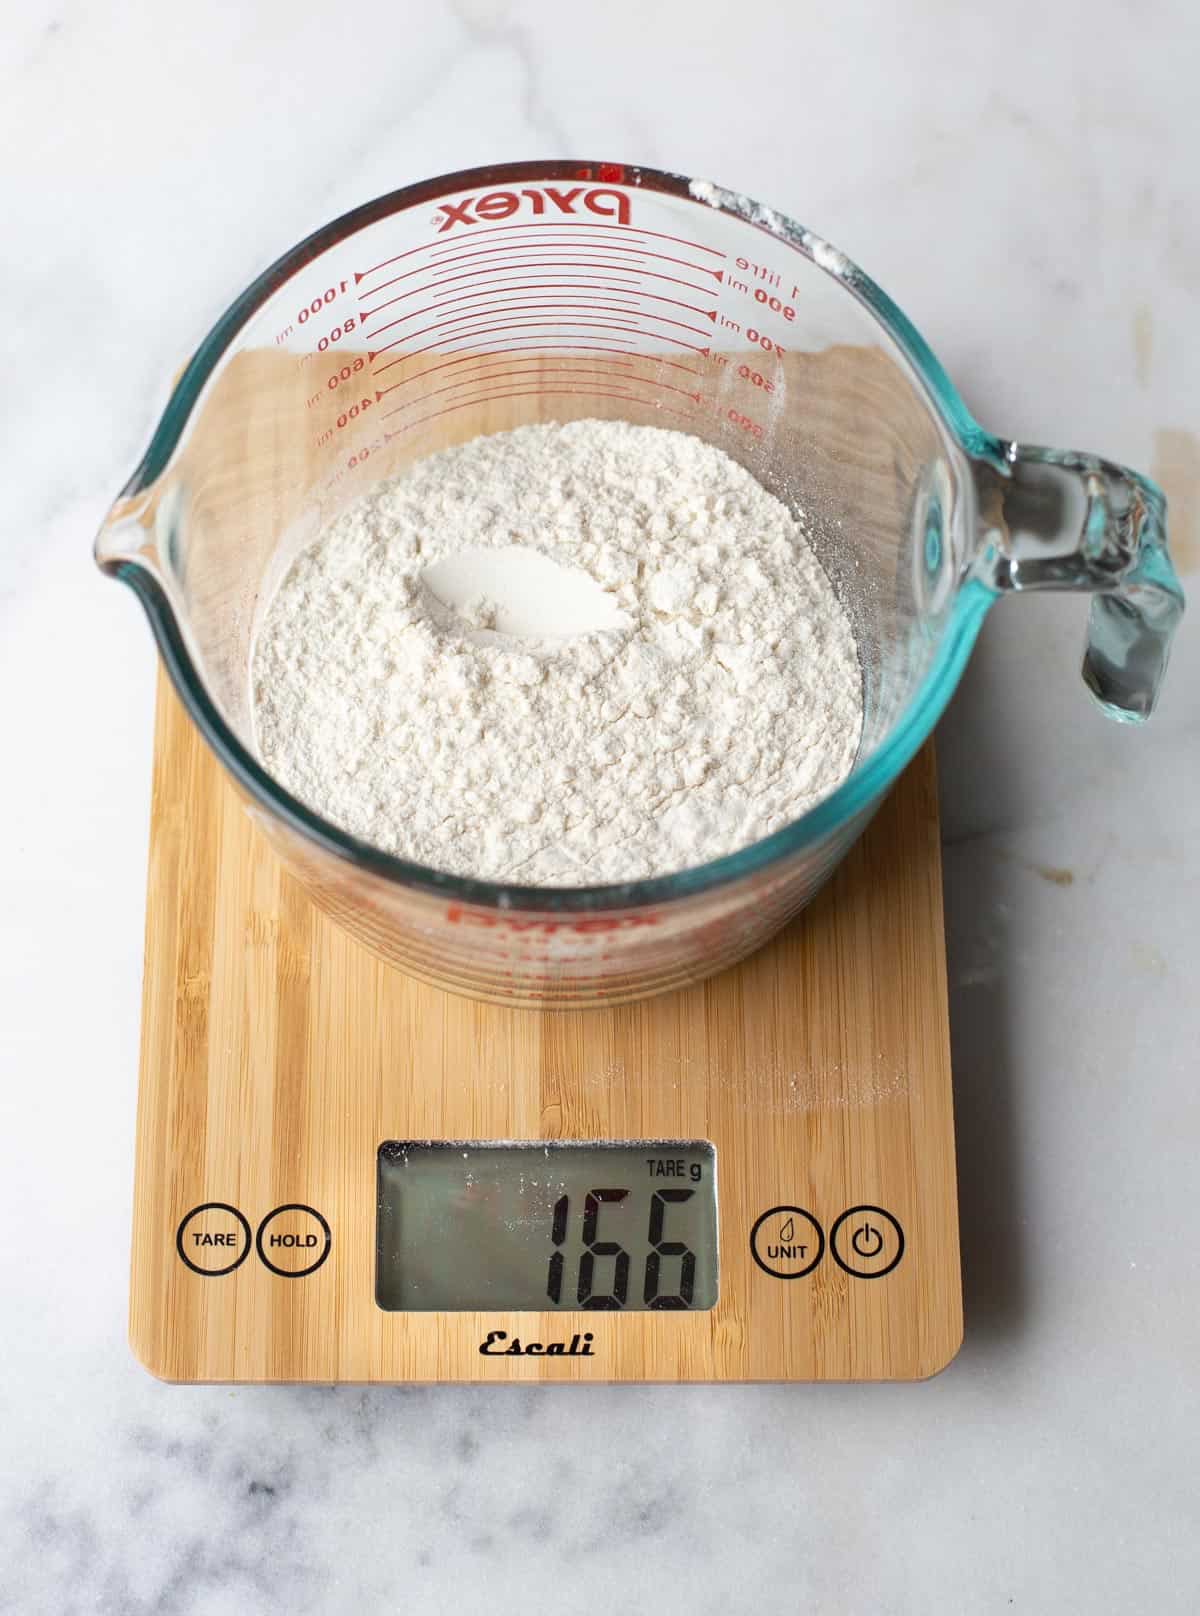
- Start by weighing out all your ingredients first. Then, in a large bowl with warm water, add the salt and the yeast. Stir to combine and let sit for 5 minutes. In another bowl combine the flour, xanthan gum, and baking powder.
- After five minutes slowly add in the flour mixture into the water and mix with your hands to combine. It will be slightly sticky. Continue to combine with hands until the dough is formed into a rough ball.
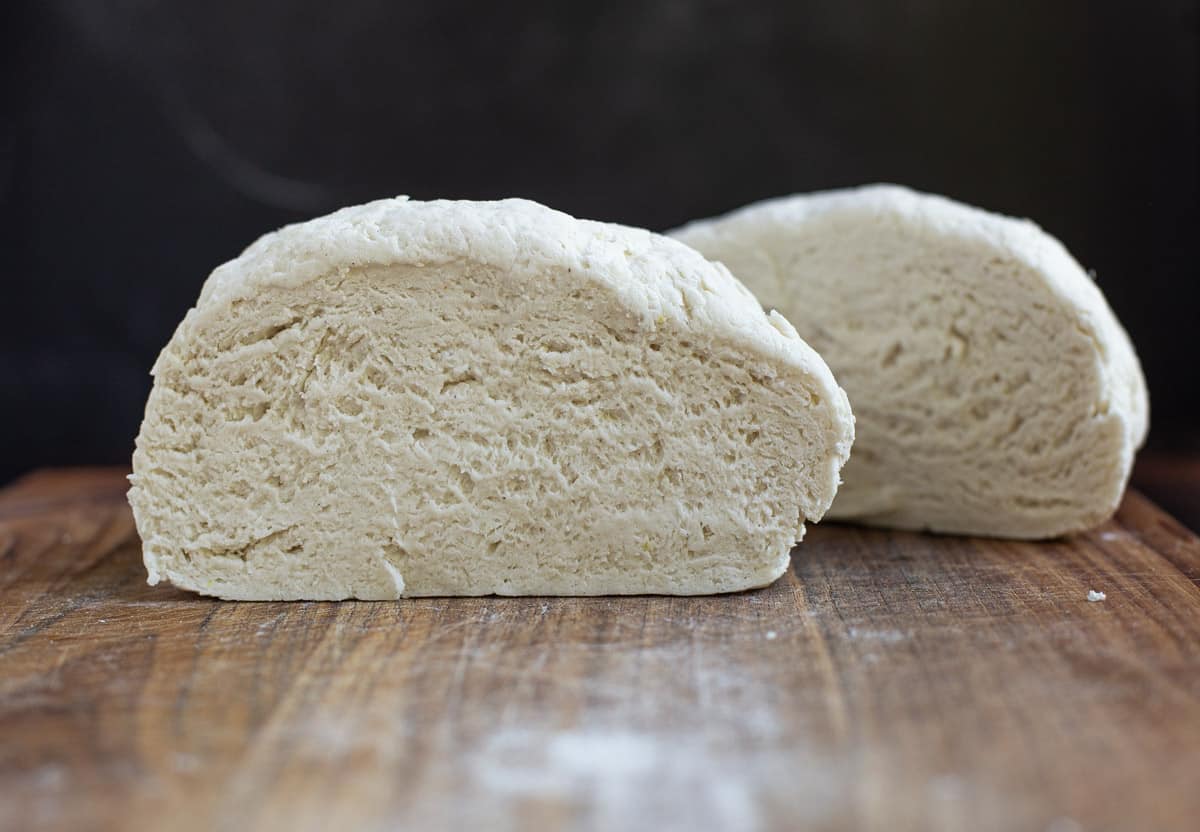
- Place a handful of gluten free flour on a large cutting board. Carefully remove the pizza dough and kneed the dough to form it into one ball for 30 seconds. Use the palm of your hands to press on the dough and then fold it in half and press again. Do this four times and then form into a dough ball.
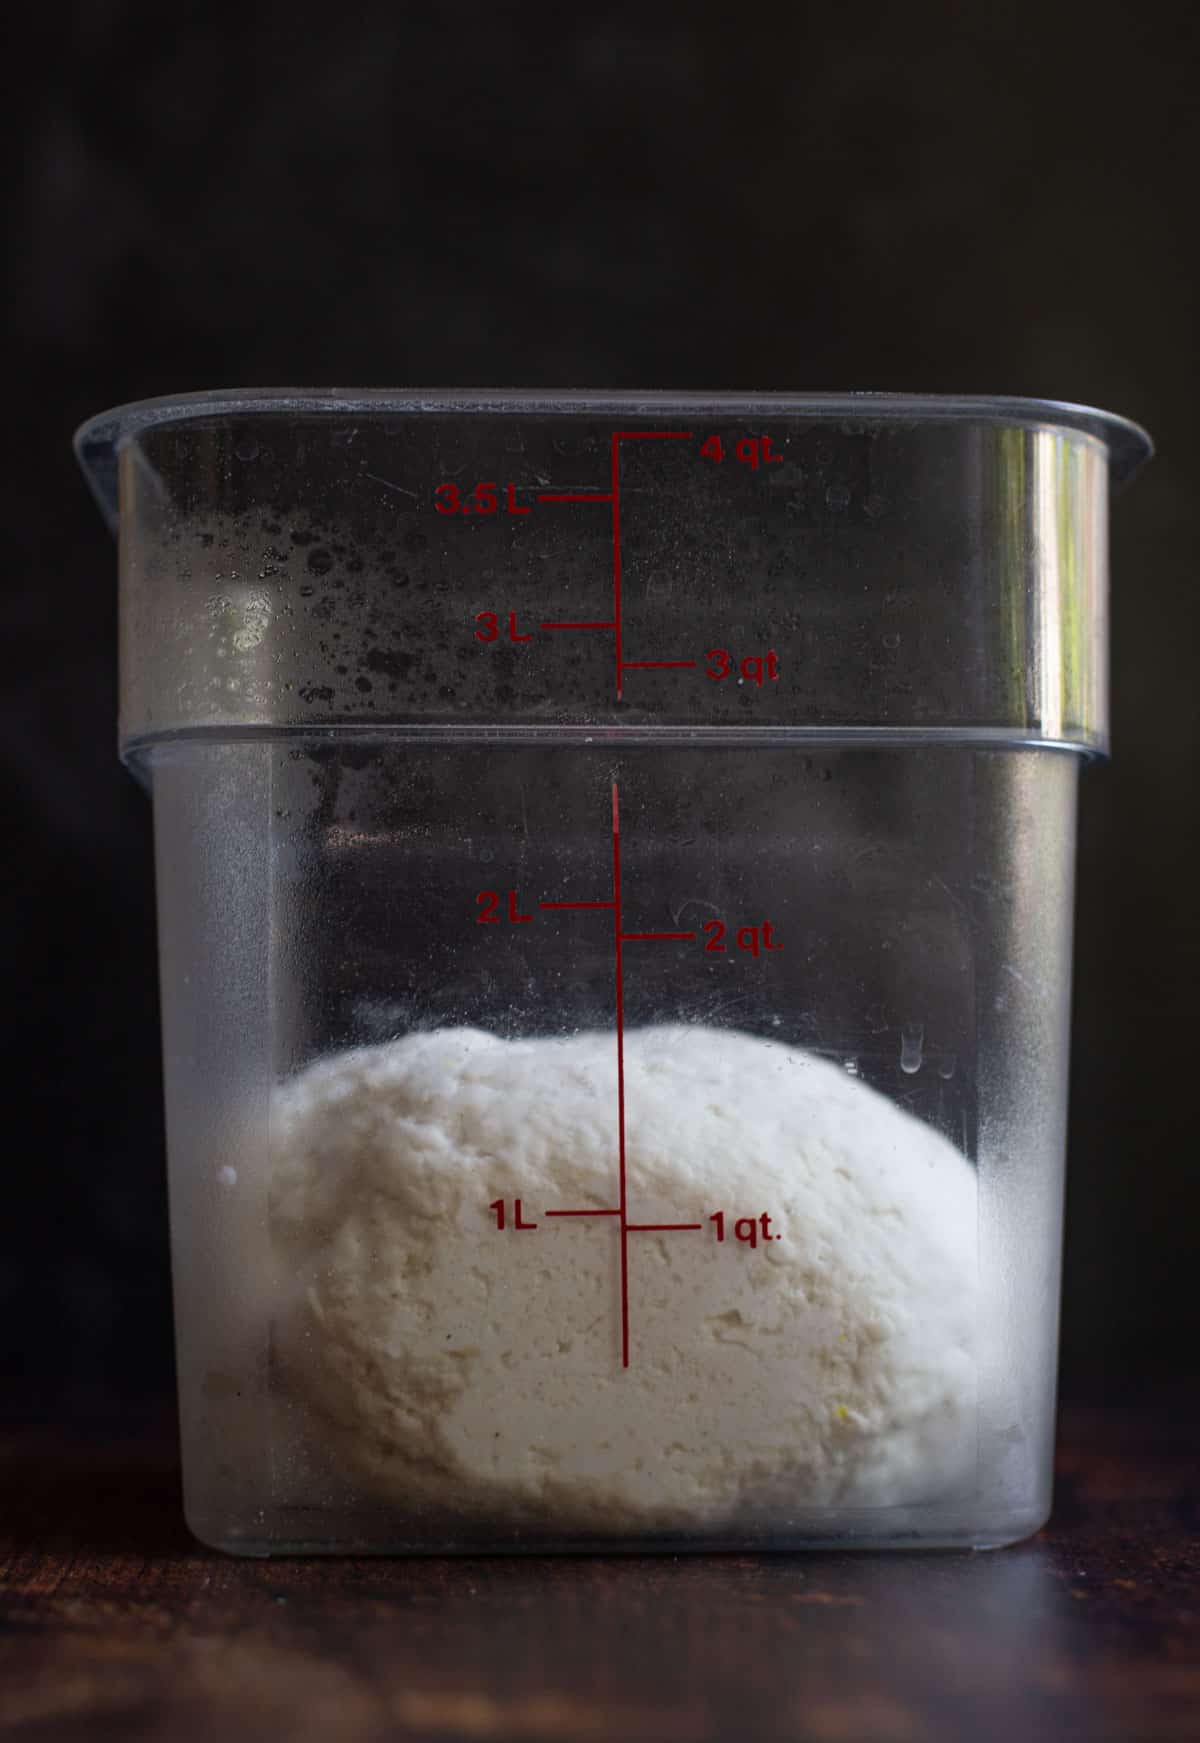
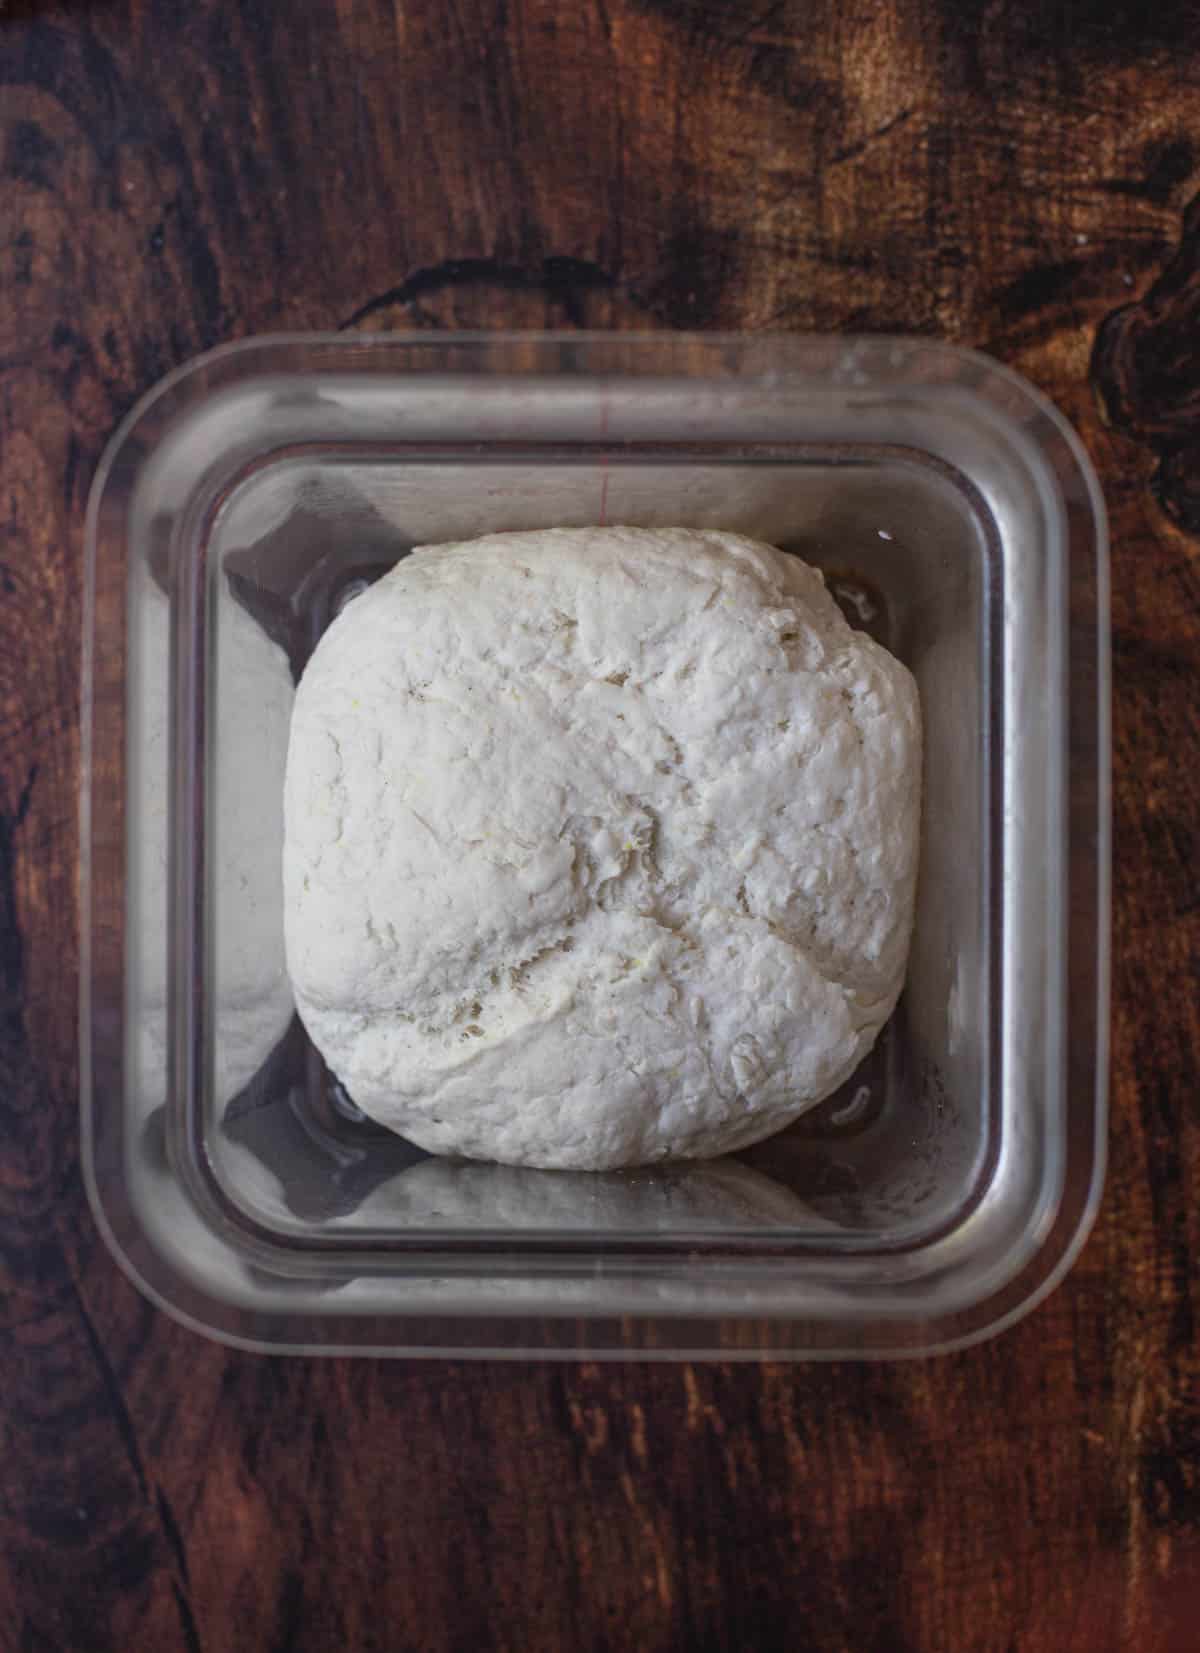
- Place the gluten free pizza dough into a lightly oiled container and cover. Allow to ferment for two hours. The dough ball will start to rise.
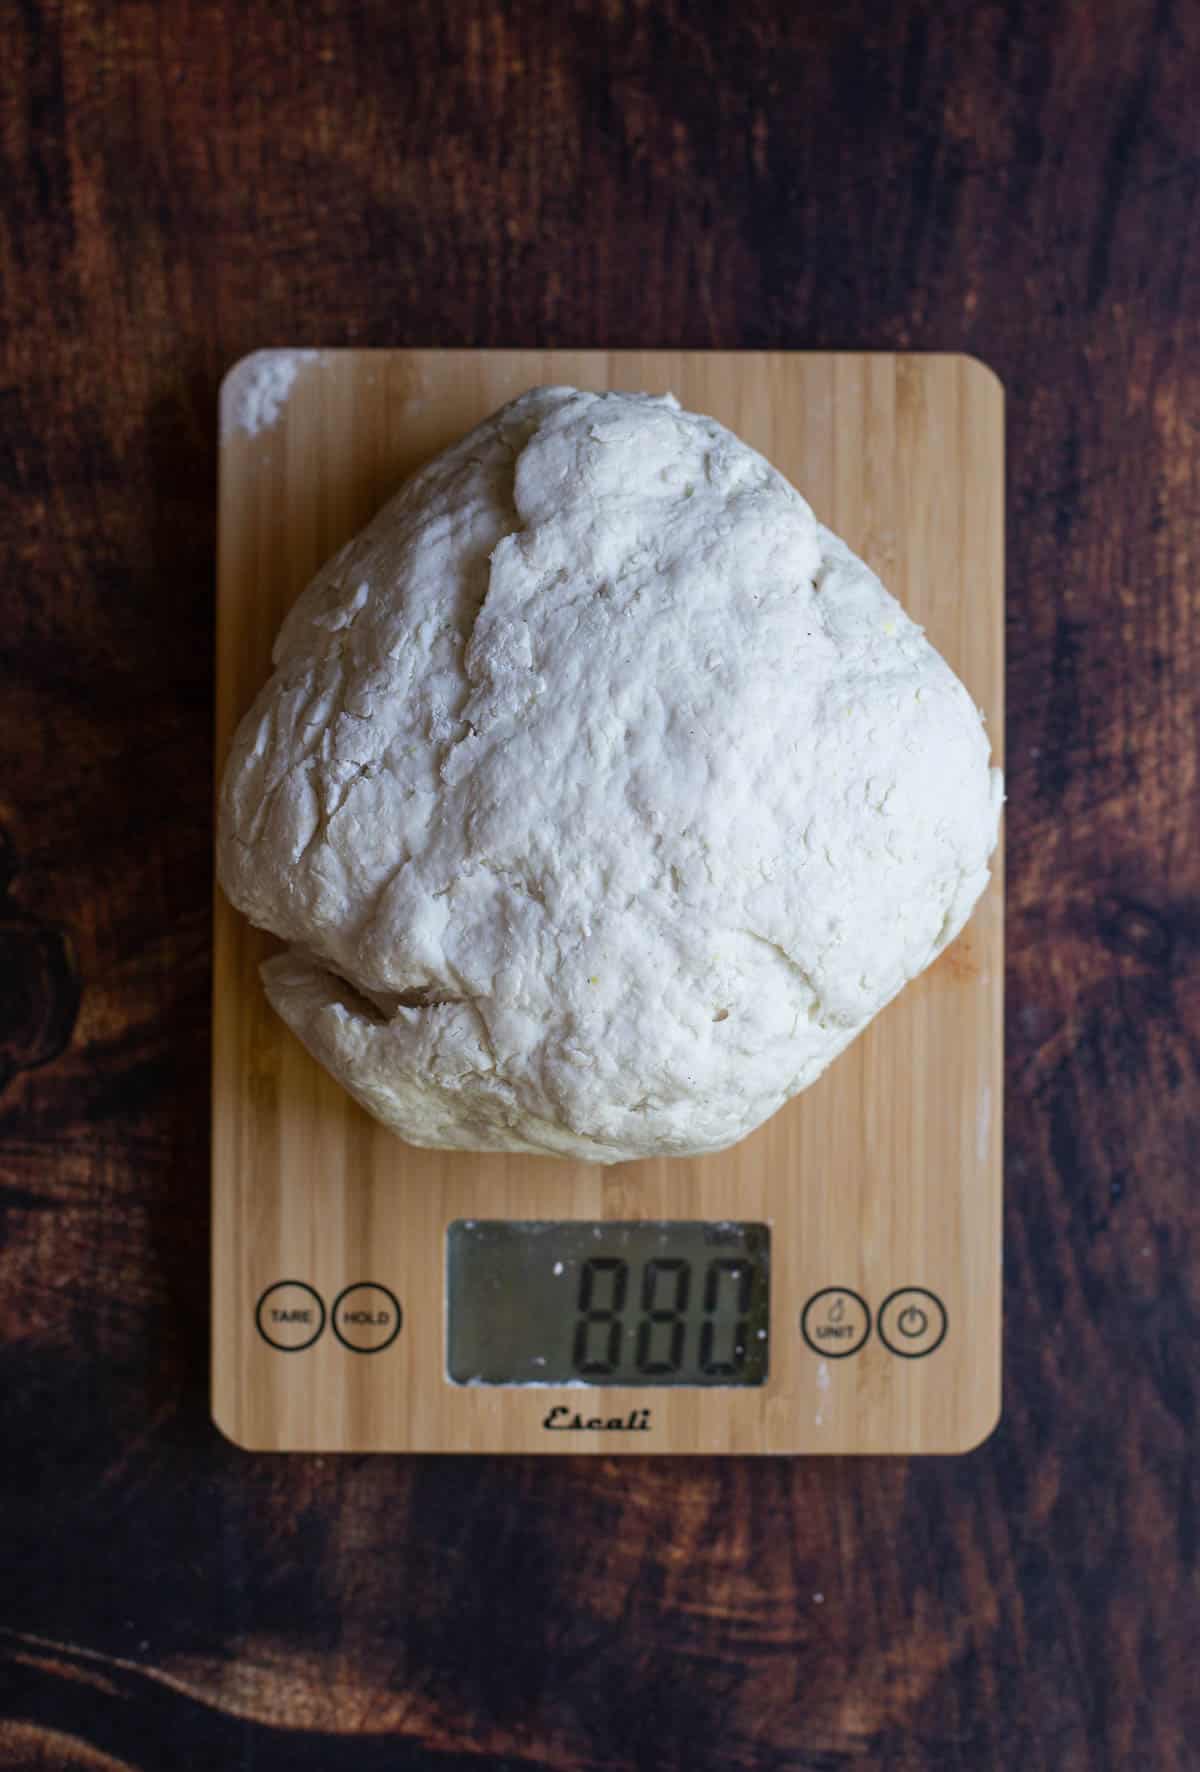
- After 2 hours remove the dough from container and weigh. Divide the number on the scale by 3 and shape into 3 equal dough balls. Form them with your hands similar to kneading earlier. In this case we had one dough ball at 880 grams which we separated into 3 dough balls that weighed roughly 293 grams each.
- Place gluten free pizza dough onto a sheet tray or dough rise container, lightly flour the top of the balls and cover with plastic wrap. Let sit for 3 hours for the second fermentation.
- After 3-hours it’s time to roll out the dough for your favorite pizza. We recommend at least 2 hours for the second fermentation and no more than 4.
Important Tip: You need to keep the dough covered while it’s fermenting! If you don’t then the outer portion of the dough will develop a hard crust that is unpleasant to form and creates texture issues.
Equipment
If you plan to make a lot of pizza (or bake in general) then you need a great digital scale.
While you can mix in a good blender we recommend this done by hand in a large bowl. For the fermentation you can use the bowl and transfer to a baking sheet or dough proofing container.
Check out our complete guide on essential pizza tools.
Making Ahead
You can make this dough the day prior. Follow the same steps and after the second fermentation wrap in plastic wrap and store in the refrigerator. Then remove an hour before you will make the pizza to let it come to room temperature.
You can freeze the dough as well by wrapping the dough tightly in plastic wrap and then placing into the freezer after the second fermentation. Then the day prior to using place in the refrigerator to thaw and then remove from the refrigerator one hour prior to making pizza. It will last three months in the freezer.
Making Pizza
You can use the exact portions of our margherita pizza recipe and substitute this dough.
- Once the fermentation is done the dough is ready for pizza. Unlike a normal (gluten) pizza crust you have to use some finesse when rolling out the dough for a gluten free pizza.
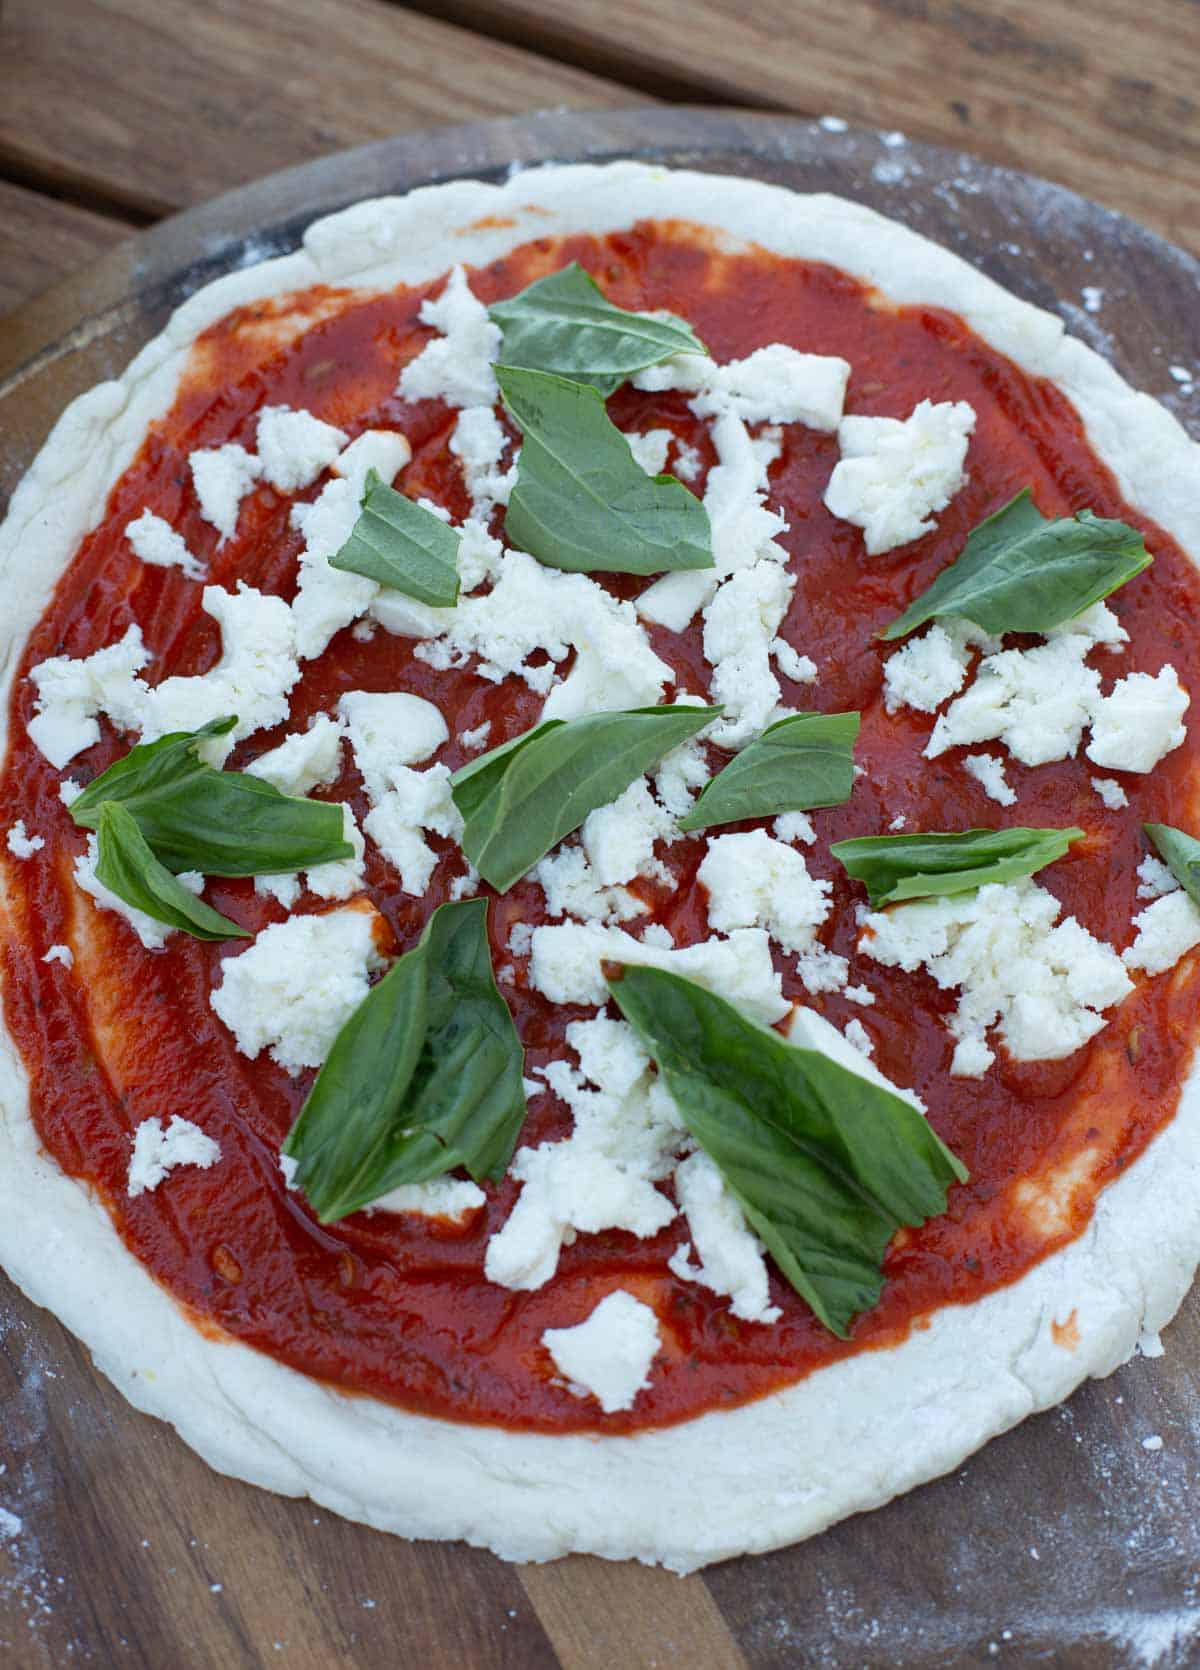
- Place the dough on top of parchment paper and flatten it with the palm of your hand. From there roll it into your desired shape using a rolling pin. The texture will feel somewhat like play dough, so they rolling pin is helpful for this dough. This recipe is for 11 – 12 inch pizzas for one dough. The edges will be rough so use the next step to smooth out and form the crust.
- After the dough is stretched out to your desired width use your fingers to pinch up the sides where you want the crust so that the dough has a ring around it that will rise as it cooks.
- From there transfer the pizza dough onto a well floured pizza peel and then add your desired toppings.
Chef’s Tip: Don’t overload a pizza with ingredients. The more toppings and sauce you add the heavier and more moist the dough becomes making it harder to release the dough from the peel.
Top tip
The ambient temperature in which the dough rises is important. Try to avoid letting the dough rise in temperatures over 75 degrees Fahrenheit as the dough can overproof.
FAQ
If the dough is too sticky add more flour in small increments until it forms into a smooth ball.
If the dough is too dry then add warm water in 1 tablespoon increments until you find the dough forms into a smooth shaped ball.
Yes. Yeast meant for baking is gluten free.
If you have a pizza stone you do not need to par bake this dough.
Yes and as we noted above the yeast is an important element in creating the texture and air bubbles from the fermentation process.
Yes, you can use this recipe for high heat Neapolitan style pizzas cooked at 1,000 degrees F or you can use in a more traditional NY Style pizza cooked at 500 degrees.
If the temperature of your location is under 70 degrees it is more difficult to keep the active fermentation going. One trick is to turn the light on in your oven and place the dough in the oven with the light on (not the oven just the light).
Recipe Inspirations
Sub this gluten free pizza dough recipe for any of our wheat pizza recipes. We also have an easy gluten free no bake pizza sauce.
- Traditional Margherita Pizza
- Spicy Neapolitan Pizza
- How to Grill Frozen Gluten Free Pizza
- BBQ Chicken Pizza
This post may contain affiliate links. This means if you click on the link, we may receive a small commission if you purchase through the link. We partner with brands we know and love and use and it helps keep the blog going!

Gluten Free Pizza Dough Recipe
Equipment
- 1 sheet tray or dough proofing container
- 1 large container for first fermentation
- 1 large bowl for mixing
Ingredients
- 350 grams warm water (Target between 90 – 100 degrees Fahrenheit)
- 1 teaspoon active dry yeast
- 11 grams kosher salt
- 500 grams gluten free flour (For best results use Caputo Fioregento)
- 12 grams baking powder (Do not use baking soda)
- 10 grams xanthan gum
Instructions
- Start by weighing out all your ingredients first. Then, in a large bowl with warm water, add the salt and the yeast. Stir to combine and let sit for 5 minutes. In another bowl combine the flour, xanthan gum, and baking powder.
- After five minutes slowly add in the flour mixture into the water and mix with your hands to combine. It will be slightly sticky. Continue to combine with hands until the dough is formed into a rough ball.
- Place a handful of gluten free flour on a large cutting board. Carefully remove the pizza dough and kneed the dough to form it into one ball for 30 seconds. Use the palm of your hands to press on the dough and then fold it in half and press again. Do this four times and then form into a dough ball.
- Place the gluten free pizza dough into a lightly oiled container and cover. Allow to ferment for two hours. The dough ball will start to rise.
- After 2 hours remove the dough from container and weigh. Divide the number on the scale by 3 and shape into 3 equal dough balls. Form them with your hands similar to kneading earlier. In this case we had one dough ball at 880 grams which we separated into 3 dough balls that weighed roughly 293 grams each.
- Place gluten free pizza dough onto a sheet tray or dough rise container, lightly flour the top of the balls and cover with plastic wrap. Let sit for 3 hours for the second fermentation.
- After 3-hours it’s time to roll out the dough for your favorite pizza. We recommend at least 2 hours for the second fermentation and no more than 4.
Notes
- Once the fermentation is done the dough is ready for pizza. Unlike a normal (gluten) pizza crust you have to use some finesse when rolling out the dough for a gluten free pizza.
- Place the dough on top of parchment paper and flatten it with the palm of your hand. From there roll it into your desired shape using a rolling pin. The texture will feel somewhat like play dough, so they rolling pin is helpful for this dough. This recipe is for 11 – 12 inch pizzas for one dough. The edges will be rough so use the next step to smooth out and form the crust.
- After the dough is stretched out to your desired width use your fingers to pinch up the sides where you want the crust so that the dough has a ring around it that will rise as it cooks.
- From there transfer the pizza dough onto a well floured pizza peel and then add your desired toppings.
Nutrition
The post Best Gluten Free Pizza Dough (Neapolitan Style) appeared first on Vindulge.
Source link