The go-to guide for perfect Smoked Brisket every time. Use our seven step guide, from selecting, trimming and how to smoke it. A Smoked Whole Brisket Recipe can be perfected by following some key steps. You may want to save this one as a favorite because you will come back to it.
We also have a complete guide for a smoked brisket flat as well if you can’t find a full packer brisket.
[feast_advanced_jump_to]
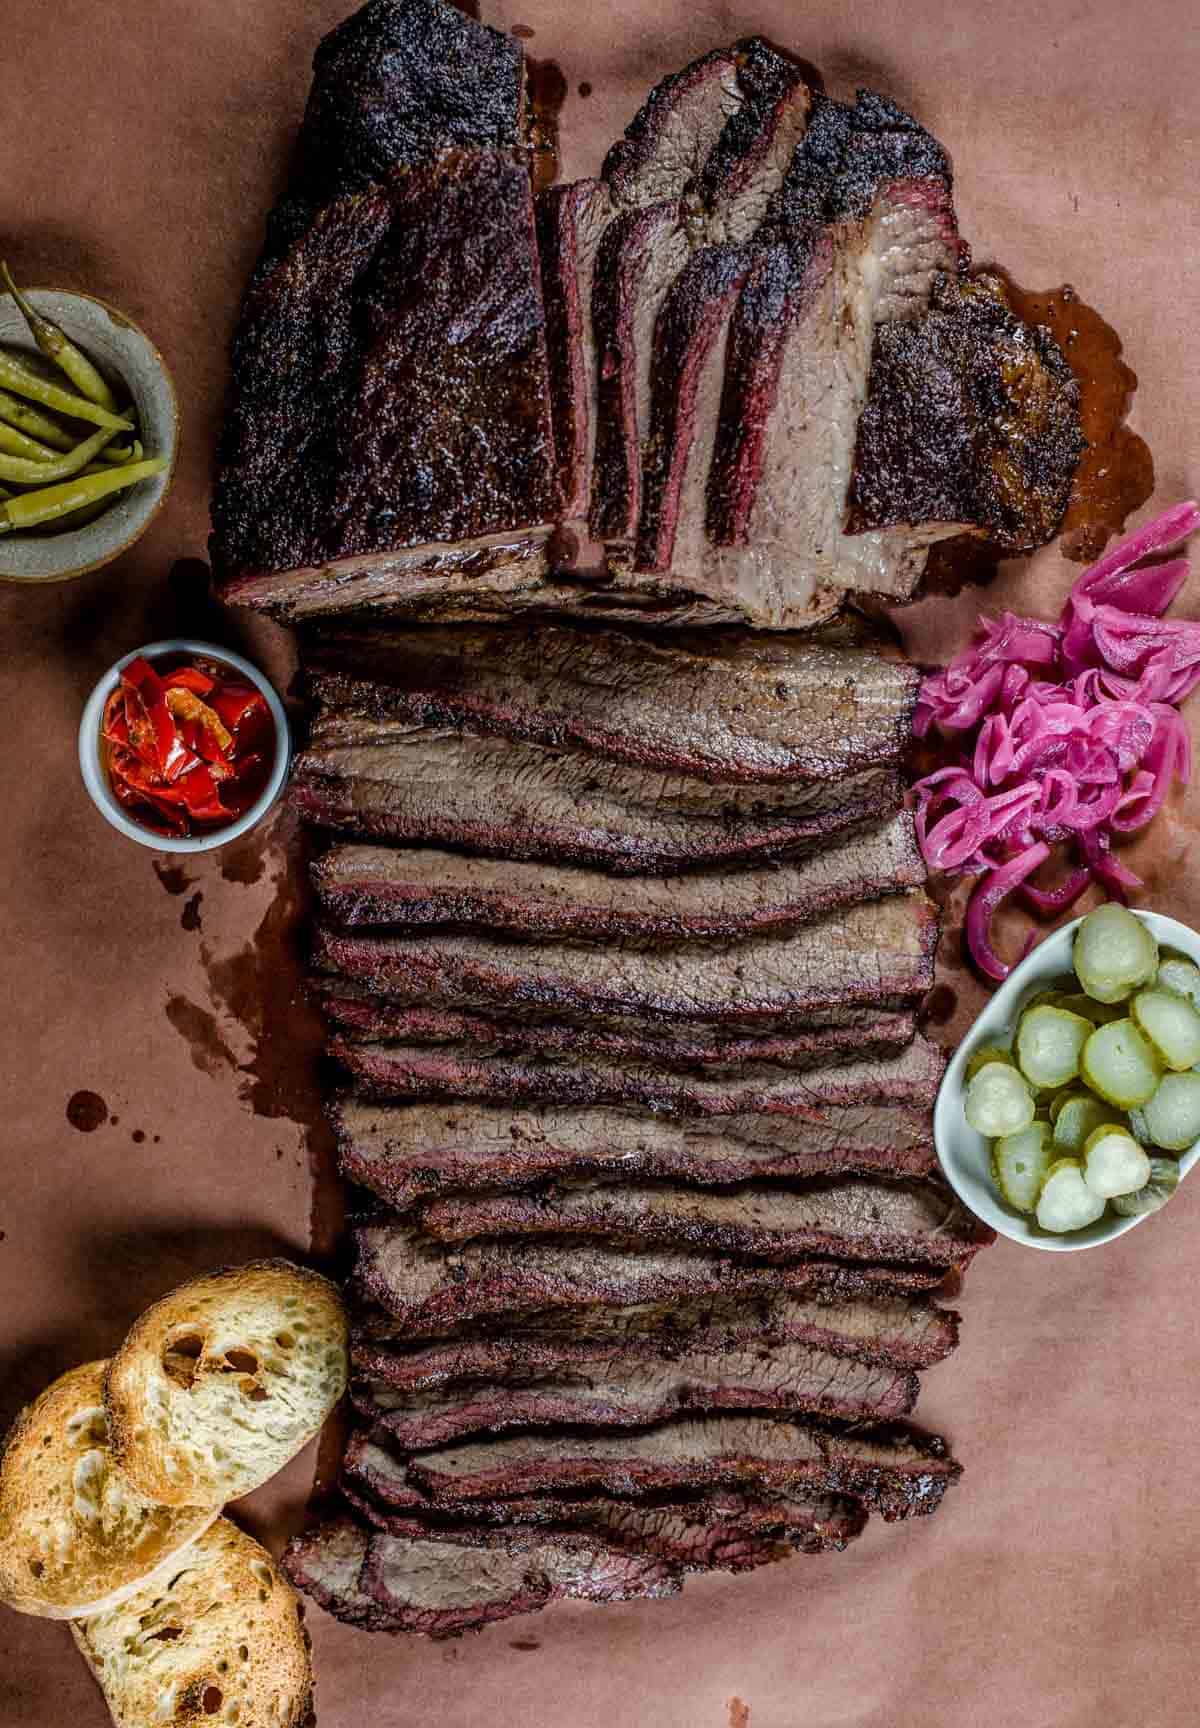
Recipe Highlights
- Smoked beef brisket is not about a recipe, it’s a process you can only learn by practicing on whatever BBQ you own, and using a few key milestones while you smoke it. Use this guide to master your smoked brisket skills.
- For a more savory flavor you can use our beef seasoning with herbs and heat.
- Check out our guide for brisket burnt ends as well.
- You can make tender brisket on any cooker from pellet grill to offset smoke with this recipe.
Smoked brisket is complicated. It’s like a long-term relationship. Don’t take what you think are the rules, and take them for granted (because the rules change with each one you cook). Treat each brisket as a new day and a new chance to perfect all the things you learned from the previous cook.
Instead of focusing on a smoked brisket recipe with exact instructions, I think it better to layout the key components of how attention to detail and the actual cut of will help you navigate how to cook one on your specific smoker. And while we dared to add a recipe below, remember the variables that all go into amazing tender smoked brisket.
So please read this first, before skipping down to the recipe!
Steps
As mentioned, each one will be different. From marbling to the way it cooks, each one needs its own TLC when smoking. We focus on seven steps for a perfect smoked brisket.
- Selection
- Trimming
- Seasoning
- Smoking
- Wrapping
- Resting
- Slicing
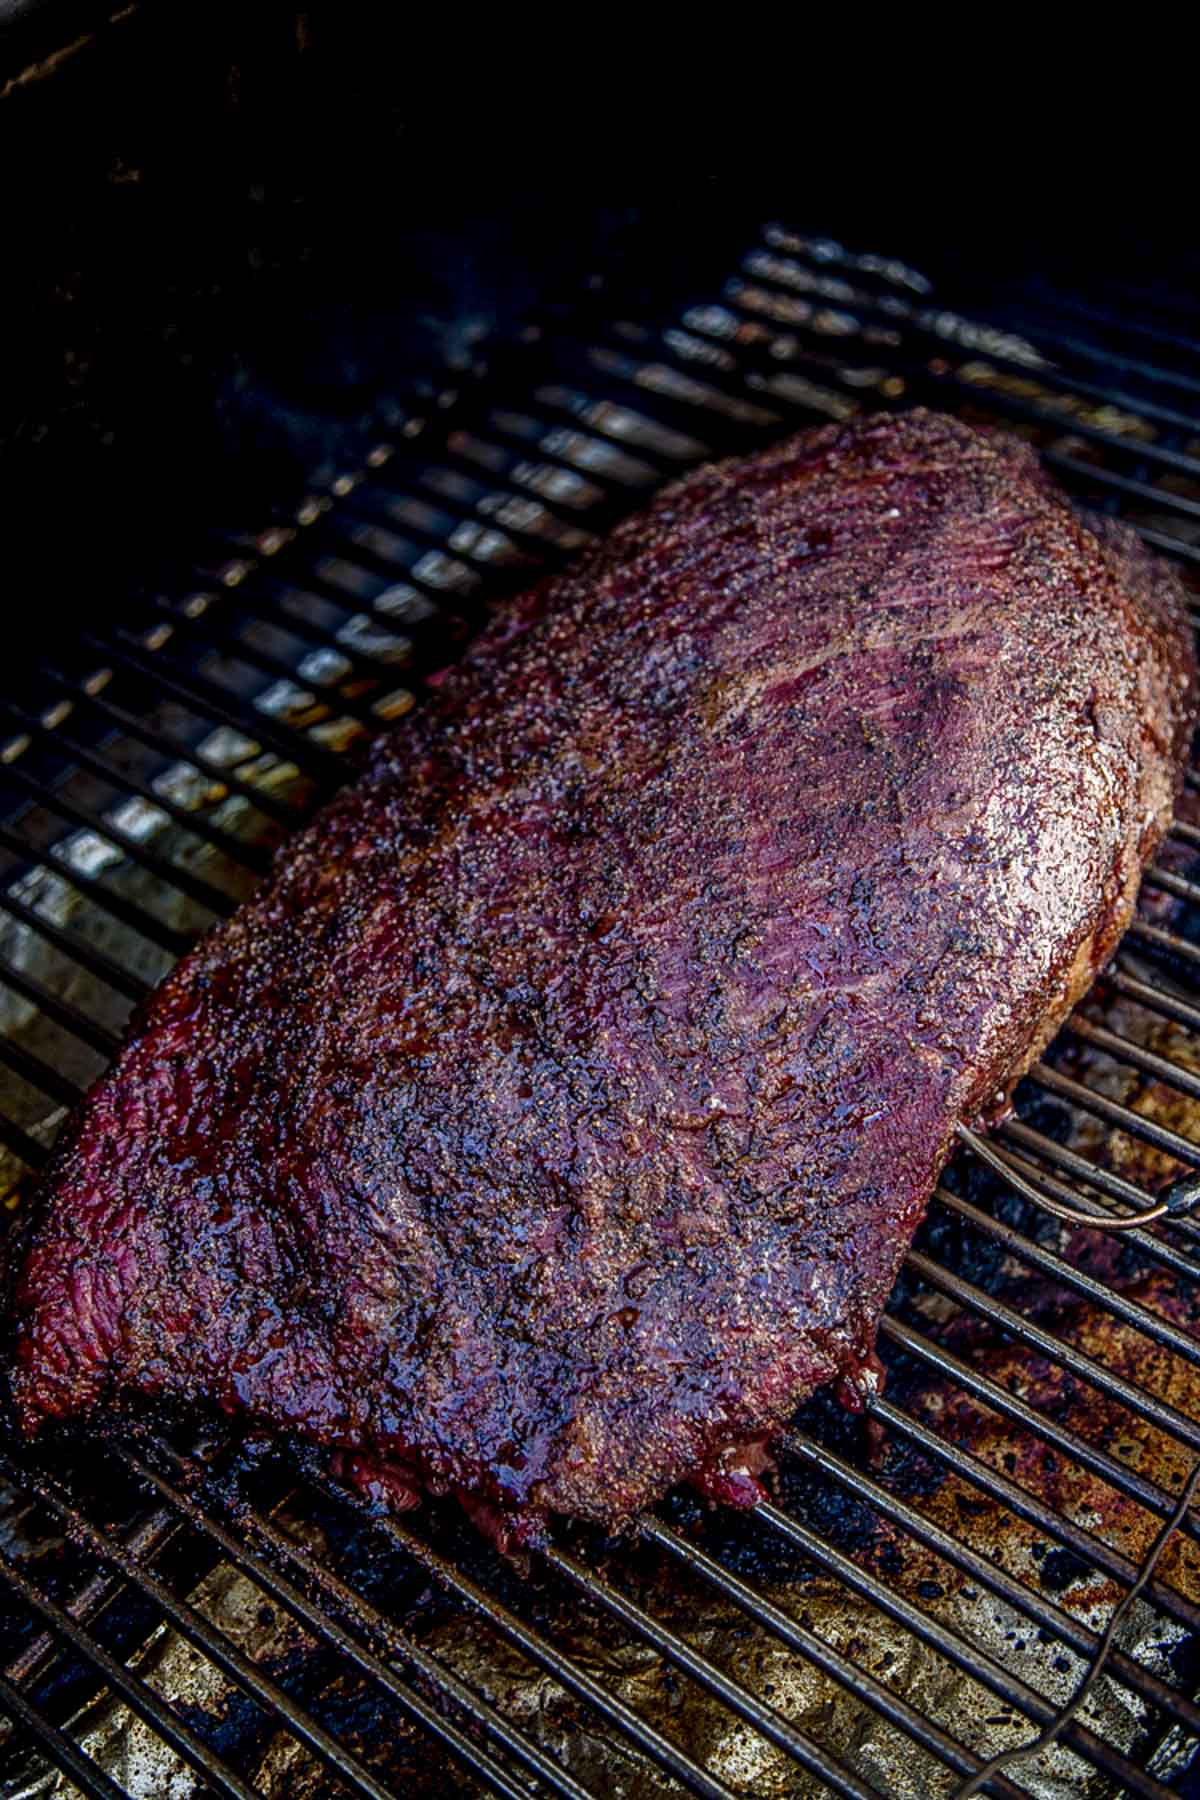
Let’s start with selection.
What is Brisket
Brisket is from the cow. There are two per cow, and is made up of two distinct muscles with important connective tissue. The point and the flat (or deckle). Each have different layers of marbling as this is an area of the cow that is used a lot as the cow walks, and so low and slow helps get it tender. It’s because of how dense the muscle is that the braising or longer cooking time is so important, it breaks down all the dense muscle and fat for a tender bite.
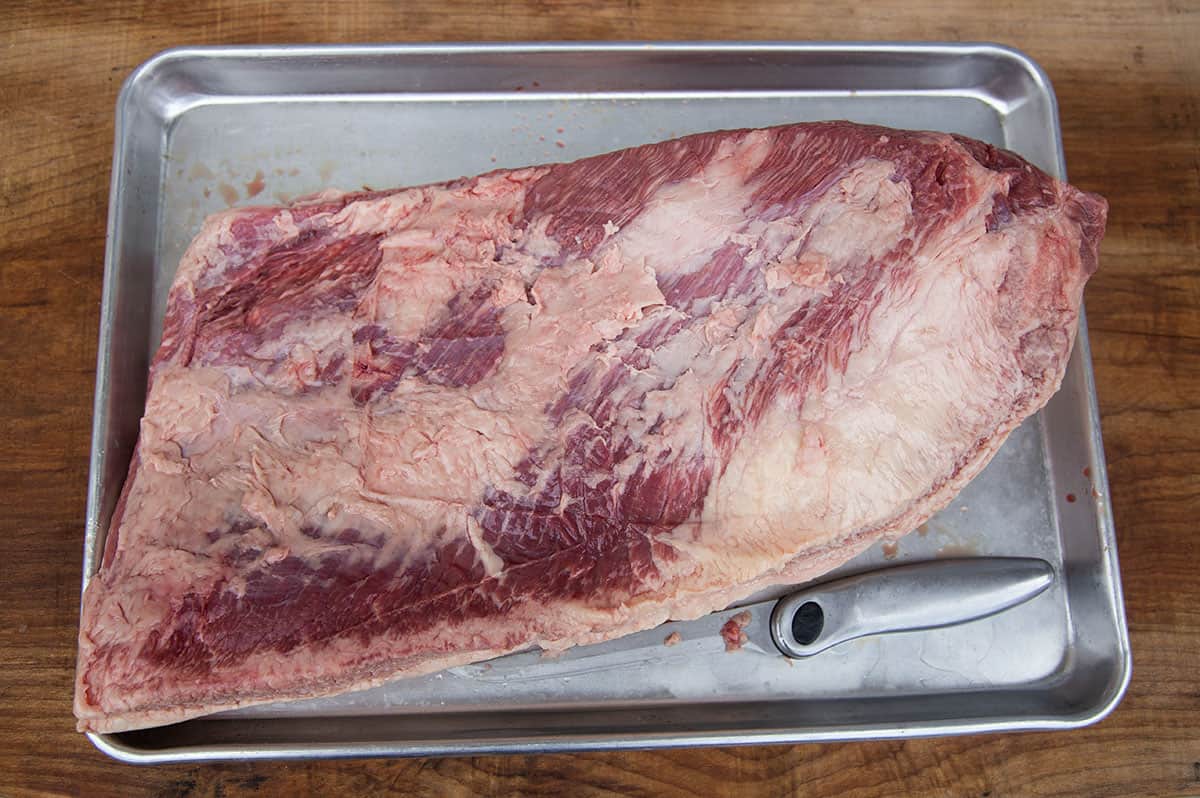
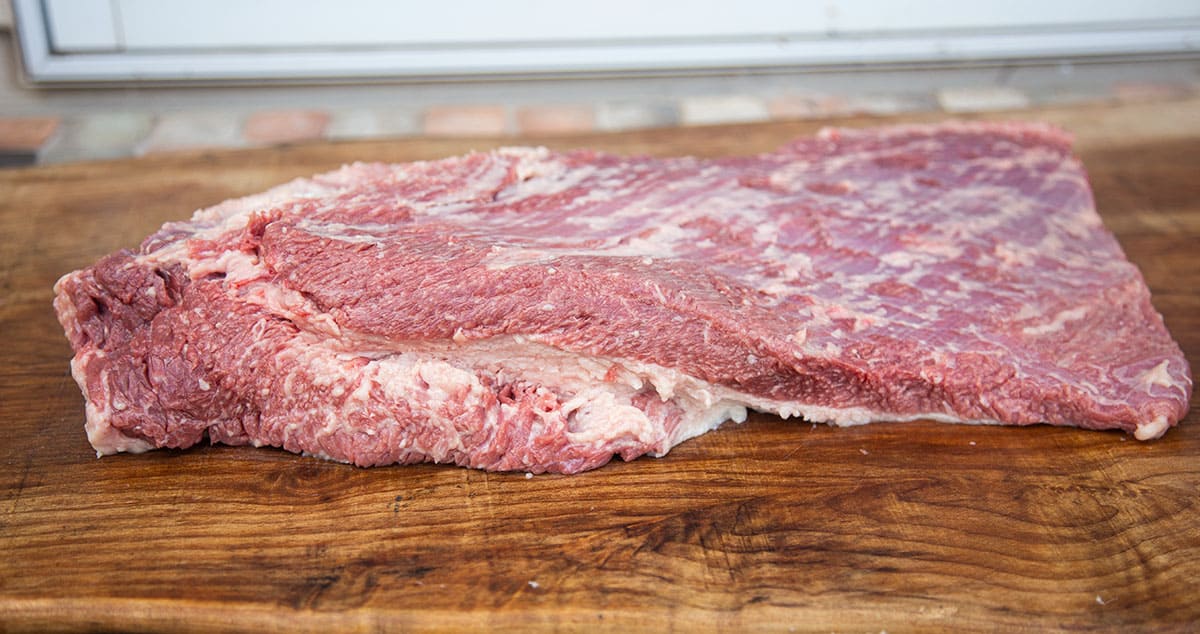
You typically want to buy the entire packer (the point and the flat). When I first started cooking, I was buying what the grocery store had in case, and most often it was the flat. The flat is leaner and is only half the story when cooking a whole packer. To get that full flavor you need the entire packer (both cuts of muscle). Go big when buying, like at least a 14 pound cut, because you will trim off a fair amount of fat, so a 12 pound packer is likely to be 10 pounds after being trimmed, and more like 8 pounds after cooking.
Step 1: Selection
You really have to understand what makes great smoked beef brisket, it starts with quality beef and what is in that beef. It’s the fat.
And most importantly the marbling of the entire cut is going to dictate a large part of the cooking experience. In order to get that rendering for a juicy tender meat morsel, you have to make sure that the brisket you are buying is of the highest quality you can afford with marbling.
- Grass Fed – Not as ideal for smoking because most often it has very little intramuscular fat.
- USDA Rated – Select, Choice, or Prime. USDA graded beef. You can see more on the difference in Choice vs Prime.
- American Wagyu – Incredible marbling. Some of the most expensive.
Because as your brisket cooks over many hours, what you are trying to achieve is the art of slowly rendering those fat pockets, causing the melted flavor to lubricate or moisturize the surrounding cells in the smoked brisket.
- When buying one at a store physically lift it and bend it to see if it’s tender and pliable. If it’s too stiff move on to a different one that bends.
We find this important as that will translate into tenderness as it cooks. When we get ours mail order, we also know that the rancher or producer of that beef has already hand selected the right cut. But when at a grocery store or box store, be sure to inspect and look for more pliable cuts. They should bend easily and not be overly stiff when you pick them up.
Step 2: Trim the Brisket
Briskets have a fair amount of fat. Some that will render, some that will not. So you have to prepare the brisket by trimming off the fat that won’t render and then season. Be sure to have a great boning or filet knife. The key is to not be afraid to trim. If you lay two briskets side by side, even the fat pockets will look different.
Start by trimming the flat side by removing the silver skin and any fat pockets just sitting at the surface.
- The brisket flat and the point are also separated by a layer of fat. The best briskets are those that are able to render that fat pocket down enough that it is pleasant to eat. But before you season, you need to remove portions of those fat pockets.
- With the flat still facing up, remove the dense white fat pocket that is on one side of the brisket. You will remove a fair amount of the dense fat pocket, almost starting to cut into and under the flat. That is about the time to stop trimming.
- Next flip it over and trim the fat cap. This fat cap sits just above the brisket point. We leave about ¼ inch of fat on the fat side of the brisket. This will allow a small layer of fat to protect the brisket while cooking. Take care when removing the fat, do it in slow and small cuts so you don’t remove too much or accidentally get into the meat.
- The sides of the brisket may have some fat hanging over the side. We typically remove another ¼ inch from both sides of the brisket to smooth out the sides and expose the meat.
At this point it is not uncommon that you have removed up to 4 pounds of trimming. Best to have a quality trimming knife.
Step 3: Season the Brisket
After trimming, we coat the brisket with olive oil which helps the dry rub stick. We mix coarse black pepper, kosher salt, and granulated garlic (not garlic powder) in equal parts in a small bowl. It’s our go to seasoning. It is simple and allows the smoked brisket to shine. This seasoning is more inspired by Texas style (although many Texans may scoff at the garlic).
We don’t inject or spritz as we have found that when buying quality cuts you don’t need it and only run the risk of creating more of a roast flavor due to the moisture essentially steaming out of the meat.
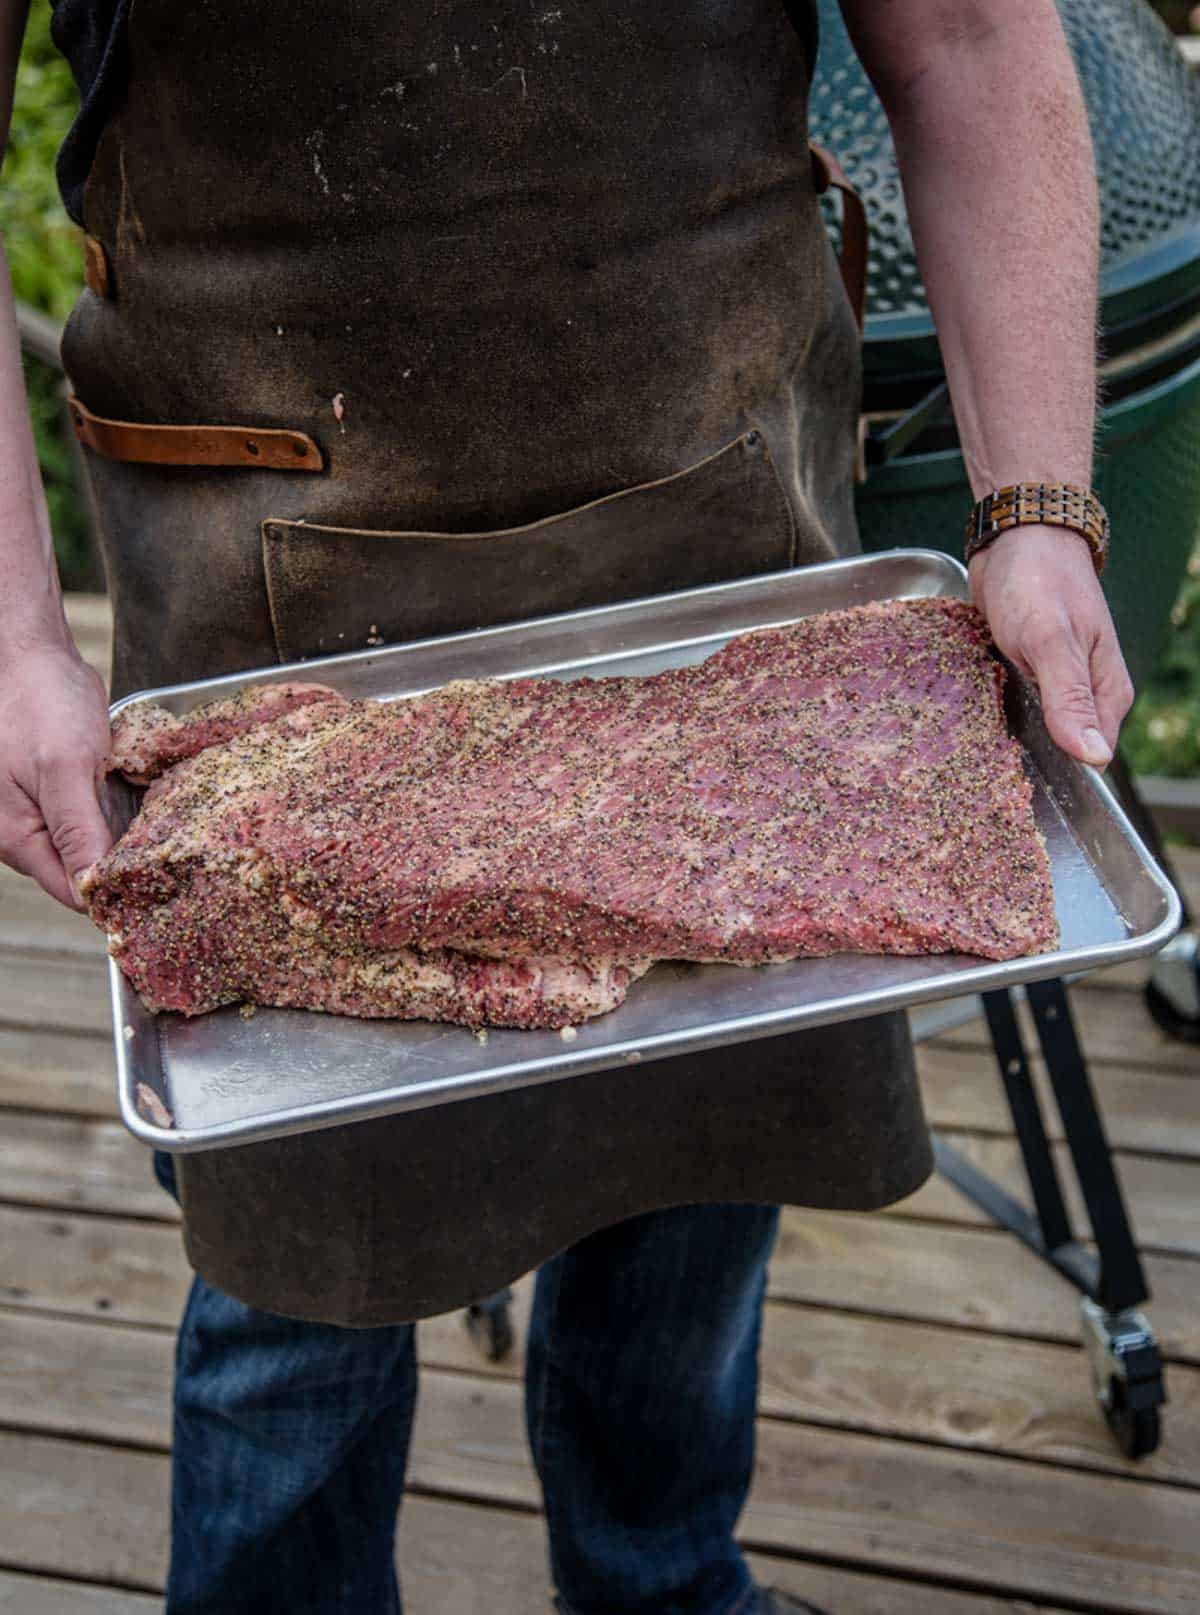
Step 4: How to Smoke Brisket
Preheat the smoker to 250 degrees Fahrenheit (F) with both lump charcoal and wood. We use fruit woods for brisket for a sweeter flavor. Insert a remote thermometer probe into the flat of the brisket, it is leaner and the more important part of the brisket to monitor while cooking. The temperature for smoking perfect brisket is 250 degrees F for slowly rendering fat. At 225 it takes longer than we prefer and it has no material difference in flavor or texture.

Flat Side Up or Down? Have the fat cap point toward the hotter part of your smoker. It will insulate the more delicate flat.
The brisket will smoke about five hours in the smoker where the smoke connects with the brisket giving both bark and smoke flavor.
Spritz (Optional) – Spray bottle of liquid that you spray onto meat after the bark forms. We don’t do this for all of our briskets, but can be done for more flavor. If you spritz, it is done while the brisket is in the smoking step and not wrapped.
Step 5: Wrap the Brisket
When the smoked brisket reaches 165 degrees F internal temperature, we remove it from the smoker and wrap it in pink butcher paper. This is called the Texas crutch.
Wrapping allows the internal temperature to rise faster. Peach or pink butcher paper is more breathable than foil, which translates to less of a “pot roast” flavor. The wrapping period is also important because it is the final stage to allow the intramuscular fat to fully render out. Don’t have butcher paper? Use foil, that’s ok. For smoked brisket you can cook it all unwrapped. It may take slightly longer and the finishing temperature guide is still the same.
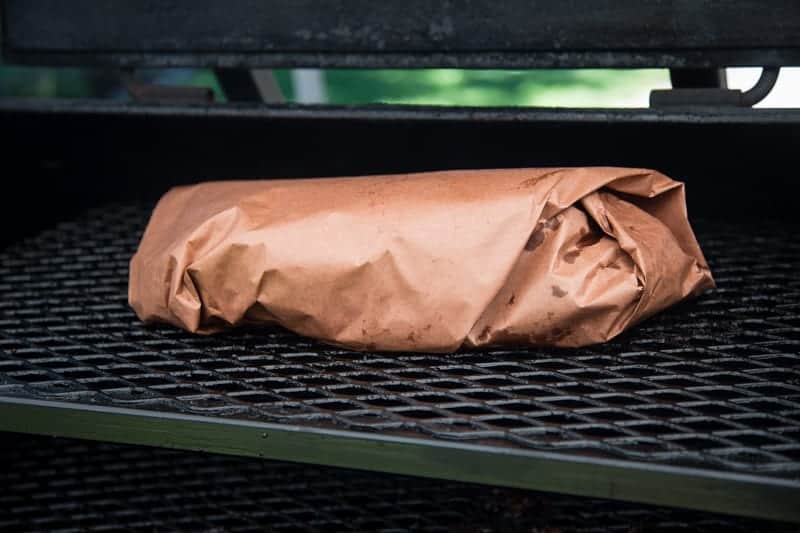
The Stall
As the brisket cooks, it will encounter a period of time called “the stall”. The stall can happen anywhere between 160 to 175 degrees F. As the heat from the smoker renders the pockets of fat, the fat liquefies. As the fat liquefies and interacts with the meat there is a cooling effect that happens, almost like when you sweat.
So don’t be alarmed if you see a couple of hours of incremental movement in the internal temperature of the meat. You have pushed through the stall when the fat has rendered enough that there is balance and the meat starts to increase in heat again.
This is why, regardless of the stall, we wrap at 165. Once the brisket hits 180, you’ll see the temp increase much faster. This is also important to note that we cook to temperature, not time. Some briskets will just take longer (or not) and why we focus on a temperature milestone rather than a specific time.
Step 6: Remove and Rest
As the wrapped brisket reaches close to 195 degrees F, it is time to start probing the meat with an instant read thermometer (like a Thermoworks MK4 Thermapen) to see if it is done. If the thermometer is meeting resistance as you insert it, that means the intramuscular fat hasn’t fully rendered out yet. It should feel as if you are inserting the probe into room temperature butter.
The most common feedback we give people is to be patient and wait for that soft butter-like feeling. We find most people get nervous and want to pull at an exact temperature. The range a brisket can be done will range anywhere from 195 degrees F to 215 degrees F. Trust the probe and keep checking every 15 minutes until you get that feel.
Pro Tip – Avoid taking the temperature in the fat pocket between the flat and the point. That will come up in temperature much faster than the surrounding brisket. So be sure to temp in the middle of the flat and the middle of the point in multiple places.
Lastly, please make sure you let it rest for at least 30 minutes after removing it from the smoker.
The smoked brisket will hold its temperature and as it slowly cools, you start to get the cells to pull back in the juices. If you slice the brisket right after removing, you’ll see all the juices just pour out on the cutting board versus staying in the meat. The horror!!! All of your hard work, gone, just like that, because you were too impatient to let it rest!
If it’s done early then hold the temperature to slowly let it cool. What do you hold it in? A cooler (with NO ice) works well. This acts like a Cambro warmer used in restaurants or for catering. You can hold the temperature for four hours in the cooler in case your brisket is done early. Just be sure to leave it wrapped. In some places briskets are held for hours before serving. Tenderness is the goal for resting.
Step 7: Slicing Brisket
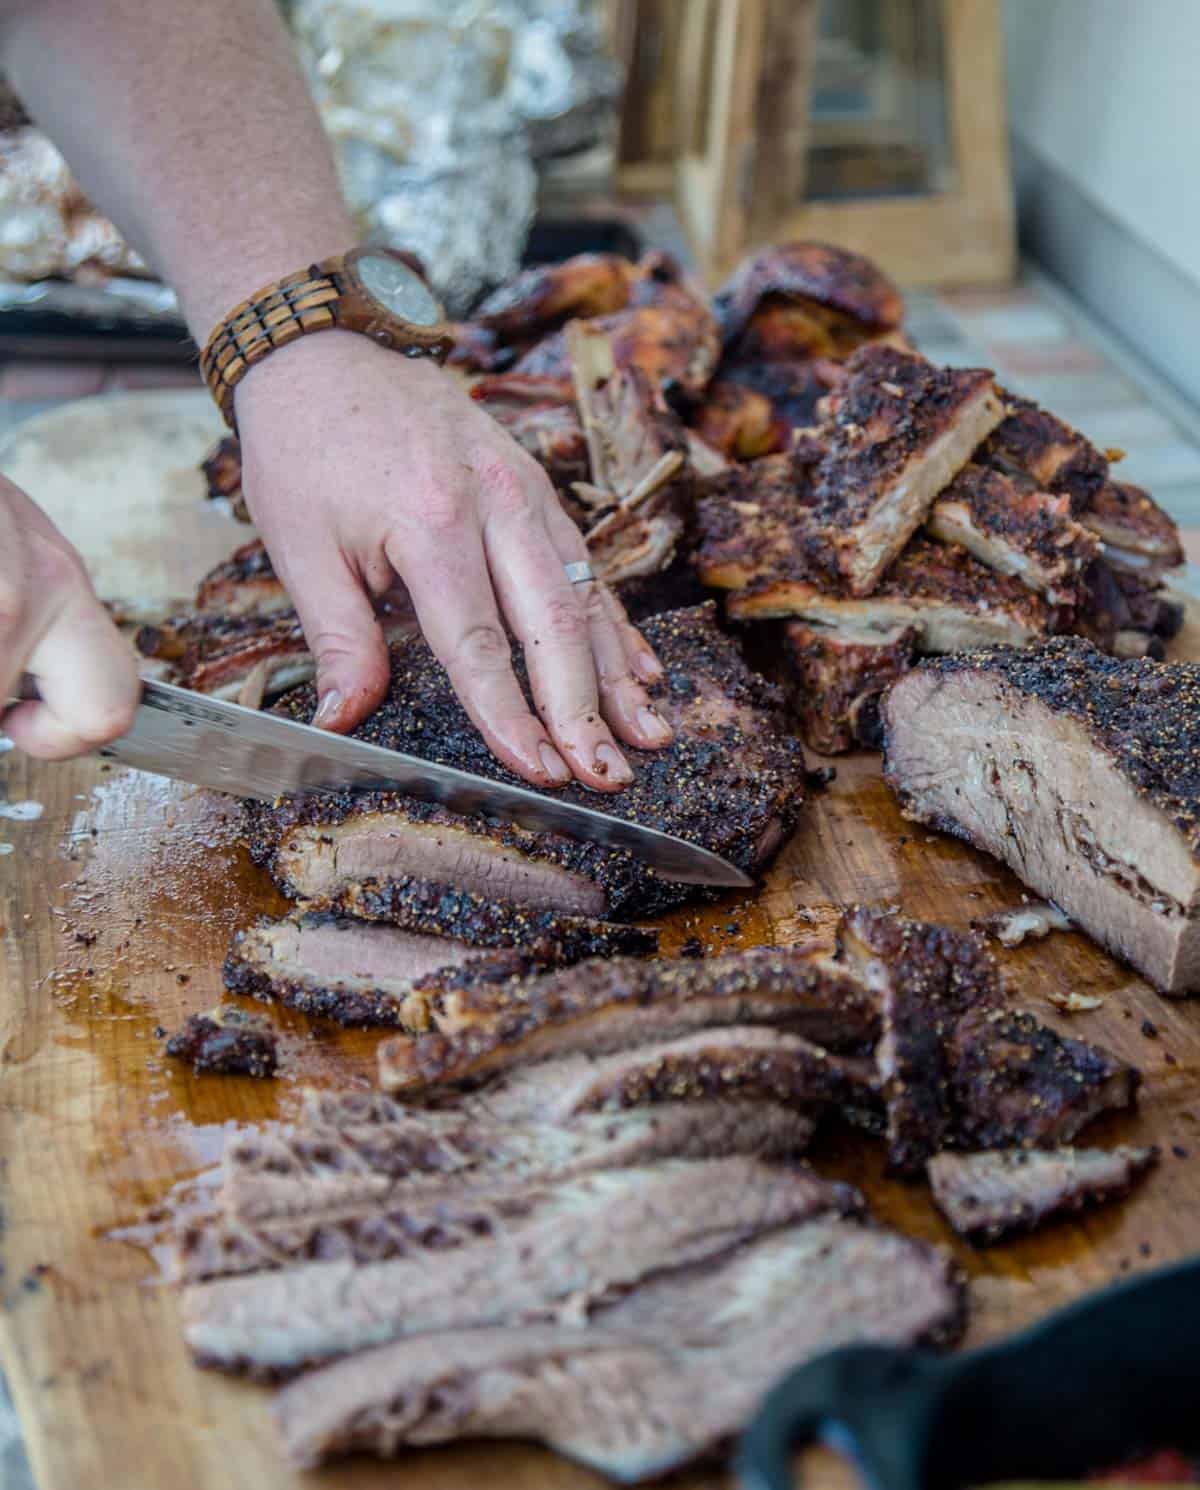
For best results, the most important step after cooking is to slice against the grains of the brisket. This is true especially for the flat cut because the muscles are in different directions than the point. Start with a long carving knife.
- Cut it in half about where the point ends. This separates some of the flat from the point.
- Slice the flat into pencil thin slices.
- Take the larger cut that is both the point and the flat, and then slice that in half. From there simply make more pencil thin slices.
Or just slice it all the way along, but for crowds, expect people to want to pick their own slices.
See video for more details on slicing.
How Long to Smoke a Brisket at 250 degrees
Generally plan 60 minutes for every pound of smoked brisket, including the rest (or hold temperature), when cooking at 250 degrees Fahrenheit. The total length of the cook can be anywhere from 8 hours to 16 depending on the size of the cut. It is normal that every brisket you cook will vary in time.
Smoke Times for Brisket
This is the post-trim weight of the brisket.
- Up to 10 pound brisket – 8 to 10 hours
- 10 to 12 pound brisket – 10 – 12 hours
- 12 to 16 pound brisket – 12 – 14 hours
- 16 – 20 pound brisket – 14 – 16 hours
We also find that American Wagyu cooks slightly faster than Prime or Choice, so we shave off about 10% of the time when smoking American Wagyu.
Monitoring Brisket Temperature
We use the Smoke Unit from Thermoworks to monitor the internal temperature of brisket throughout the BBQ cook. It even has a remote unit so you can see the temp from afar.
In addition to the Smoke unit, you should also use a Thermapen or equivalent instant read thermometer, then you can probe in multiple areas while keeping the Smoke unit in the same location as it nears the end of the cook.
Tools Used for Smoked Beef Brisket
- Quality Knife for Trimming
- Dependable Brisket Carving Knife
- Peach Butcher Paper
- Two zone thermometer
- Instant read thermometer
- Large tongs
Sides
If looking for sides consider quick pickled veggies like peppers. Add some BBQ Beans and a no mayo coleslaw for the perfect spread.
Smoked Brisket FAQs
Like Kansas City style BBQ? Cut out the point or parts of point from the brisket before the wrap. You then slice it into cubes, re-season, place back into smoker to render out. Delish. Check out this post for our Brisket Burnt Ends.
There is no right or wrong answer here, it’s about your flavor preference. If you elect not to wrap you get a greater bark. People love that texture. You won’t really add more smoke flavor, as that pretty much gets absorbed around the fifth hour of cooking.
But we have found wrapping in pink butcher paper is the best of both worlds. Note that if you do not wrap, it may add 20 minutes per pound to the cooking time. So be sure to account for that.
In the end your flavor preference is what is key and the meat. We generally are not injecting smoked briskets because we buy at least Choice or higher in quality levels. If you buy Select, or find that the fat layers don’t look as pronounced, consider injecting with beef stock using a culinary syringe similar to our pulled pork recipe.
SPG rub for us (equal parts Salt, Pepper, Garlic), keeping it simple so we highlight the meat flavor and smoke.
Go local. We are in the Pacific Northwest with an abundance of apple and cherry trees, so we use fruit wood as it burns sweeter and avoids the campfire-like flavor you can get from mesquite. In Texas? Obviously post oak.
We’ve got you covered. The best recipes for leftover brisket always start with good smoked brisket. And yes, you will have leftovers (sometimes).
On average it takes 60 minutes per pound for a whole packer brisket. A 10 pound trimmed brisket should take roughly 10 hours when you include resting. Be sure to calculate your time based on the trimmed brisket.
Plan 90 minutes per pound at 225 degrees. We find there is no material difference in flavor or texture and recommend cooking at 250.
This post was originally published in 2016, and updated in 2022 with more Q&A and details. The original recipe remains the same.
If you like this recipe we’d truly appreciate it if you would give this recipe a star review! And if you share any of your pics on Instagram use the hashtag #vindulge. We LOVE to see it when you cook our recipes.
This post may contain affiliate links. This means if you click on the link, we may receive a small commission if you purchase through the link. We partner with brands we know and love and use and it helps keep the blog going!
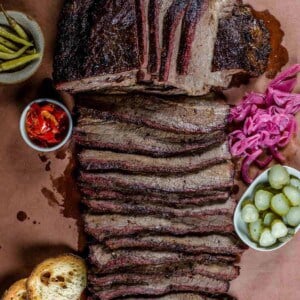
The Ultimate Smoked Brisket Recipe
#wprm-recipe-user-rating-0 .wprm-rating-star.wprm-rating-star-full svg * { fill: #ffffff; }#wprm-recipe-user-rating-0 .wprm-rating-star.wprm-rating-star-33 svg * { fill: url(#wprm-recipe-user-rating-0-33); }#wprm-recipe-user-rating-0 .wprm-rating-star.wprm-rating-star-50 svg * { fill: url(#wprm-recipe-user-rating-0-50); }#wprm-recipe-user-rating-0 .wprm-rating-star.wprm-rating-star-66 svg * { fill: url(#wprm-recipe-user-rating-0-66); }linearGradient#wprm-recipe-user-rating-0-33 stop { stop-color: #ffffff; }linearGradient#wprm-recipe-user-rating-0-50 stop { stop-color: #ffffff; }linearGradient#wprm-recipe-user-rating-0-66 stop { stop-color: #ffffff; }
Equipment
-
Sheet Tray
Ingredients
- 12 – 15 pound packer brisket, flat and point
- ¼ cup extra virgin olive oil
For the Rub
- 1 cup beef rub
Instructions
-
Season Brisket: The day before cooking, trim the excess fat off the brisket, apply olive oil to brisket. In a separate bowl, combine your dry rub ingredients, and liberally apply to the brisket. Leave in fridge overnight prior to cooking covered in plastic wrap.
-
Preheat Smoker: The day of cooking, preheat your smoker to 250 degrees F, we use fruit wood like apple or cherry.
-
Smoke Brisket: Place brisket on the smoker (using large tongs) when the temperature is a consistent 250 degrees and insert your two-zone meat probes. One for the meat inserted into the flat, and one to monitor the ambient temperature of the cooking chamber. Smoke for up to six hours until it’s ready to wrap.
-
Wrap Brisket: When the internal temperature of the brisket is 165 degrees you will carefully remove the brisket and place onto two pieces of pink butcher paper to wrap. Remove the meat probe, tightly wrap the brisket, and then add the meat probe back into the same general area. Place back into the smoker to continue smoking until it’s done.
-
Continue cooking at 250 degrees for another several hours until the brisket approaches 195 degrees. At that point, you will use your instant read thermometer to insert and probe the flat and the point for that smooth buttery texture as you check for doneness. Anywhere from 195 to 205 it may be done.
-
Remove and Rest: Once the brisket is done, remove, still wrapped in butcher paper, and let it rest for 30 minutes (or place into a cooler with NO ice to hold the temperature until ready to serve).
-
Slice and Serve: Slice against the grains and serve.
Video
Notes
Gas Grills – Review our guide on how to smoke on a gas grill. Plan on having two bags of wood chips.
Find the perfect wine pairing at the Vindulge Wine Shop
Nutrition
The post Smoked Brisket – How to plus Tips and Tricks appeared first on Vindulge.


